Wednesday 30 April 2014

Science of a Snowflake

Hello. Welcome.  This is a follow up to last nights post over at the PaperArtsy blog.  I wanted to share a few more photos, tips and how tos in the hopes you may be inspired to make your own anyday snowflake.  If you want to just go for it then there are very good instructions here but for those who are a little unsure or are interested to see what happens when you cross a scientist with a crafter read on.

Here's what we are making


I've used the gorgeous Chatsworth Paper Collection and two PaperArtsy dies, Spotty Dragonfly and Moth.   It looks complex and beautiful.  It's really easy.  But still beautiful.  The scientist in me delights that I found a formula that works whatever size you want to make.  I didn't want a crease across the papers so I drew the cut lines on each piece with a pencil, cut with a knife and then rubbed out the pencil lines.  To find your cut lines....


OK, it's not pretty but blogger isn't being very co-operative!!  First you need a square of double sided paper and a ruler or, as in this case, a piece of card with a width 1/10th the size of your paper.  I used 15cm paper so my measure is 15mm wide.  20cm paper 2cm wide measure.  For our friends across the pond 10 inch paper 1 inch wide measure, 8 inch paper uhhh...  Oh, you get the idea.  Draw a diagonal Line A.   Draw a diagonal the other way and also a line the other side of the measure Lines B.  This gives you your no cut zone.  Lay the measure along the edge of the paper.  Draw a line from A to B (Line C).  Don't cross B.  Repeat on all sides then move the measure in to draw more lines parrell to the C line.  And again.  You end up with 3 C lines on each side, joined at A and seperated at B.  That sounds complex but it's really easy.  Mad Scientist jumping up and down and rubbing hands together with joy.  Cut from A along C to B.  This gives a nice sharp corner at A, which will be visable.  It doesn't matter if you over cut a little at B or if the knife wanders a little along the C line.  It won't show once we fold it up.  USE PENCIL so you can rub it out. 


Here's what a cut piece looks like before and after folding.  You need six of these.  The Chatsworth papers have a white core so I have inked all the cut edges with VersaMagic Jumbo Java chalk.  As long as the white edges were covered it didn't matter if there was a bit extra here and there.  All adds to the look.  I also worked each of the cut areas between my thumb and fingers to stretch the paper a bit in the direction I wanted to fold them.   You can also see some of the moths and dragonflies I have cut using the dies.  


I put the six folded sections together to make my snowflake using three of the six different papers for this.  I love that these papers are of a collage style.  Each side offers a variety of patterns and shades.  If I was doing this again with these papers I would probably make each section at least 20cm square as they were quite rigid and I had a few sticky moments trying to balance the tension once I put them together.  At one point I thought I would be sharing a hat or a fruit bowl but after a little tweaking and twiddling.........  


I've used all the different design papers to cut the moths, dragonflies and for stamping the sentiment.  The moth and sentiment are from PaperArtsy USNT4.  The dragonflies are stamped with modern girl from LPC022 and stuck to both sides of three layers of die cut cardboard.   The sentiment was mounted both sides on PA heavy greyboard.  The chain was from a PA monster box.  


Here's the whole project.  Incidently if you use 15cm (6inch) papers your 'snowflake' will be about 40cm (16 inch) from point to point.  20cm (8 inch) papers give a whopping 50cm (20inch) from point to point.  If anyone tries 30cm (12inch) papers I would be very interested to know what size monster construction you achieve.  

Thanks to PaperArtsy for giving me this opportunity and thanks to you all for looking and reading.  Hope you liked it.  Do drop over to the PaperArtsy blog and check out the other creations that are being posted every evening.

Thanks for dropping by.  Hugs

Record Breaking

Hello.  Welcome.  The post man came a few hours ago bringing happy mail.  I think this must be a record for me.  Happy mail to blog post in only a few hours.  The mail in question was Poppystamps Bountiful Sunflower die which I was lucky enough to win in their recent blog hop.  It spurred me along to finish a very simple project for the Scor-Pal challenge Monochromatic


I used my Scor-pal to score horizontal and vertical lines on my card.  I've seen this done but didn't realise how quickly, easily and effectively it transforms a flat card into something so much more interesting.  I used Dried Marigold Distress Ink pad to highlight the lines.  The over spill is a pleasing side effect.  Then I cut the Poppystamp Bountiful Sunflower from some orange patterned paper and backed it with orange card.  I had to fussy cut the back piece because I don't have the matching die.  Will have to do something about that!  This is definitely going to be a popular cut.  I also extended the stem slightly to take it off the card.  The sentiment is a stamp from PaperArtsy SIDD5 set which I stamped in Dried Marigold and then again in Black Archival. 

Joining the fun at
Scor-pal More Than One Score Challenge - Monochromatic
Bunny Zoe's Crafts April Challenge - Distress
Simon Says Stamp Wednesday Challenge - Anything Goes
StampARTic April Challenge - Dies

Thanks for your visit.  Can you believe it's the end of April already?  A few things to craft before the witching hour.  Back soon.  Hugs

Do Not Adjust Your Set

Hello.  Welcome.  Almost the witching hour and just wanted to share an ATC for the Wicked Wednesday ATC Challenge.  This weeks it's Quotes and Words.  I went with this little beauty......


Sorry about the blurdiness.  Obviously camera thinks its bedtime too.  Wanted to show you the background.  I used Hero Arts Word Pops stamp, embossed with white and then inked with VersaMagic Aegean Blue, Ocean Depth and Night Sky.  I wiped the excess ink off the embossing with a cloth.
 

The ship is the top part of a stamp from PaperArtsy LPC001 set and the sentiments is a Great Impressions stamp.  Both were stamped using ColorBox Arctic Deep chalk.  

Joining the fun at

Thanks for dropping by.  Hugs

Tuesday 29 April 2014

Well Blow Me Down and Stand Me Back Up Again

Hello.  Welcome.  I am so excited.  Over at PaperArtsy, which is one of my favourite places to be, the guest design terms are coming to an end and I was lucky enough to be picked as a 3UP'er.

What's that you say?

Go check it out.

Here's a sneaky peak of my project


Hop over to PaperArtsy for the full reveal and the other 3Up delights.  Big happy hugs.  

More photo's and some how to tips

Sunday 27 April 2014

Ding Dong Merrily a Tag

Hello.  Welcome.  Back with PaperArtsy inspiration and Lin's lovely paper tape background caught my eye.  Didn't have any of the lovely tapes or colours she used but did have some in shades of blue sent by my CCC buddy Janet.  I decided to do a little stamping as well and the MME Indie Chic stamps were still out so that helped the idea come together.  


I applied pieces of paper tape to a white tag, with some stamping here and there.  The tape measure, zig zag and birds of a feather are all stamps from MME Ginger Pictures stamp set.  Then I gave it a wash of diluted Pea Coat to tie it together


I added some white paint splats using Crafty Individuals splat stamp and stamped Ding Dong Bird in black.  Then I had a moment and made a collage of some Prima Fairy Belle flowers, stamped Ding Dong bird again and fussy cut.  The words are from PaperArtsy EDY06 stamp set and the little roundelle is part of a LPC003 stamp.  A brad and some fancy fibre and he's good to go.  

Joining the fun at
PaperArtsy
ALBC - Birds and Bees
Simon Says Stamp Work it Wednesday March 2014 
Stampinback Challenge - April 

Thanks for your visit.  Hope you have sunshine.  We do and I'm off to enjoy it.  Hugs

Saturday 26 April 2014

The Girl in the Moth Mask

Hello.  Welcome.  I hope you are having sunshine.  It's been a fabulous day here and we even had a BBQ!!  In April in Norway!  That's got to be a wow.  Lots of fun happenings over at PaperArtsy.  Inspired by Sam's tag I made this card.....


I started by painting my base card with PaperArtsy Fresco Finish Butternut.  I was going to do a brayered background but got kind of carried away LOL.  Then I couldn't find the perfect stamp so I made one using a piece of dry wall tape and some left over foam cushion.  I used Do Crafts Chocolate pigment ink.  Then I used a piece of card from the scraps box to make the black lines and my Gelly Roll white pen for highlights.  If you like my sketchy lines that's what you get when your pen is on it's way out.  Annoying but artistic hee hee.  I found a piece of crunchy wax paper previously embossed with Sizzix Patchwork Embossing folder and some corrugated packaging I had painted white for another project which I repainted black.


I had stamped a few Lynne Perrella images the other day and this one from PaperArtsy LPC022 is a second generation stamping.  I liked the faded look.  Then I stamped again using Brilliance Rocket Red Gold onto a PaperArtsy Moth diecut.  I have used this stamp with the moth before and usually line the eyes up on the wings but I noticed that her eyes fit perfectly between the antennae and wings and the red gives some great eye makeup.


The three circles are from PaperArtsy SIEN10F stamped in the Rocket Red Gold.  I edged the card with black Archival.

Joining the fun at
PaperArtsy
Tando Creative Challenges - Recycling
The Artistic Stamper Creative Team Challenge - Embossing and Texture
Simon Says Stamp Monday Challenge - Big Stamp 
The Next Best Thing - Misfit

Thanks for dropping by.  Hugs

Friday 25 April 2014

Like a Bird On The Wire

Hello.  Welcome.  I have been playing along with Darcy's journal challenge and despite having a month to join in I still manage to leave it to the last minute!  When I saw Darcy's pages this month there were some stamps that immediately leaped to mind but the colours have had me a bit flummoxed.  Despite knowing I don't have anything like them and must move past it it still became a bit of a block.  How silly is that??  Anyway I realised I was running out of time but yesterday the sun ran off with the mojo leaving us grey and uninspired.  Today I was feeling blue and decided that if I didn't start I certainly wouldn't get very far so I threw some paint at my journal page and it then one thing led to another...


 Ripped book paper and a variety of blue acrylic paints


A stamp from MME Indie Chic Ginger Picture stamp set, pansy and snowflake fresco finish paint


Frame and border stamp from Simon Says Stamp Artful Borders stamp set.  The zig zag border is also coloured with blue Galaxy Marker.  Interlude to go and round up some sheep.  It's all happening here. 


I've used a previously made orange brayered background.  I stamped with the little round stamp from PaperArtsy SIEN10F, fussy cut and stuck them round the frame.  Dream is Sizzix Movers and Shapers die and the frame is stamped on the same background using another stamp from the Simon Says Stamp set.  The moth is cut using a PaperArtsy Moth die and stamped with the moth from USNT4.  The moth is not stuck down yet, maybe I should have placed him in the frame but I am still debating with myself over orange or blue flowers.  What do you think???  Also I want to add some white details but my gelly roll is just about dead so we will call this a work in progress. 

Joining the fun at
PaperArtsy Darcy Journalling Month 3
Stamping Sensations April Challenge 
A Sprinkle of Imagination - Anything Goes 

Thanks for dropping by.  Thanks for your comments.  Please feel free to let me know what you think, about this or anything else.  LOL  Hugs. 

Wednesday 23 April 2014

Witch Job Share

Hello.  Welcome.  It took me 5 attempts to spell witch!!  I blame it on too much sun!!  Hurray, the sun.  Four days in a row and a toasty 19C in the shade.  Amazing.  Lots of garden time.  Things are certainly springing......  No baby bunnies yet though!  Hopefully some will appear later this week. Was hoping for a fluffy birthday present but never mind......

I've been working on a little something using the sketch from Papirdokkene, the recipe from Joan's Touch using pastel colours for The Greeting Farm, and Cheery Lynn wanted something for Mother's Day.  Phew!!  Kay, I hear you laughing!  It all came together and looks something like this......


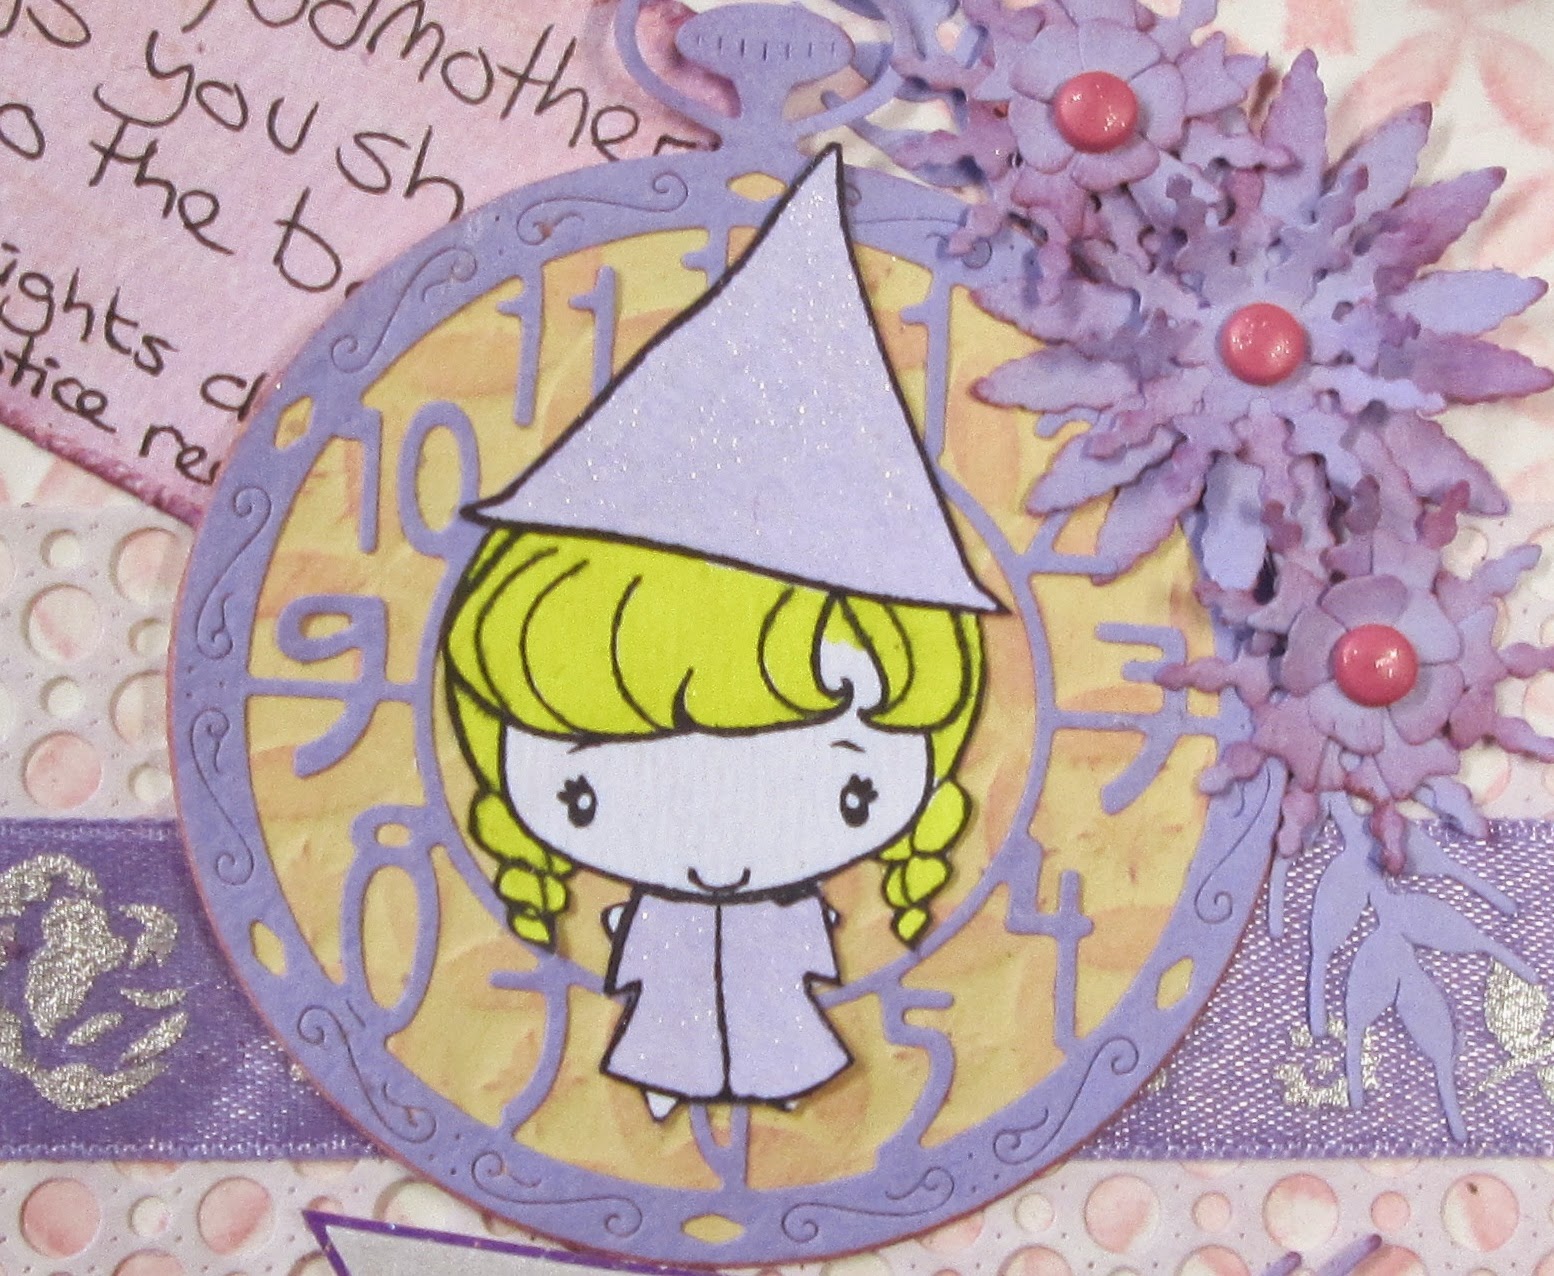
I've used the little witch from The Greeting Farm Spooktacular set.  She's providing holiday cover for the Fairy Godmother.  Tooth Fairy gigs are much more her line but the Tooth Fairy only takes summer vacations cos she's always so busy from Halloween through Easter what with all the extra candy consumption.  I paper pieced her with lilac paper and added Wink of Stella clear.  I've used a purple base card and added a purple layer embossed using Nellie Snellen Flowers and Leaves embossing folder.  I added a white layer embossed using Cheery Lynn Diamond and Starburst embossing plate.  I cut Cheery Lynn Tiny Bubbles Border in white and added some purple ribbon which has a silver rose pattern.  I cut Cheery Lynn Pocket Watch and backed it with some apricot paper.  Hope that's OK Joan LOL  The flowers are Cheery Lynn BAF #1 and Wheat Heads cut in purple paper.  All the edges were distressed and coloured with VersaMagic Perfect Plumeria.  I also used this ink to highlight the embossing and flowers. 


The tag is cut from MME paper.  I've use the same purple ribbon and distressed inked edges.  I decided this was the perfect thing for a mother's day card, a voucher for child minding.  What mother doesn't need an evening off?


Of course this idea could be adapted for any special occasion where you want to give your time or skills.  


Isn't she sweet.  Gotta love the Wink.  
 
My card joining the fun at

Thanks for your visit.  Hope you are having sunshine.  Hugs

Tuesday 22 April 2014

Easter Egg Hunt

Hello.  Welcome.  Which came first, the Chicken or the chocolate egg?  Earth Day or Birthday?  Hee hee.  Definately Birthday.  Happy Happy to me.  Just working on a little alternative Easter Egg Hunt for Wicked Wednesday ATC challenge.


I used Papermania Spring Life papers for my ATC base.  I stuck onto card and cut out with Sizzix ATC and corners die.  I seriously distressed the edges and then went a little crazy in the middle as well.  Then I inked with DI mini pad Walnut Stain.  Saw these cute mini pads and couldn't resist!  The Penguin is a Crafty Individuals stamp stamped with ColourBox Black Cherry ink and coloured with PaperArtsy Fresco Finish Limelight.  I fussy cut him.  Love his punk look.  The grass is hand cut and the egg is a Making Memories brad.  I added the lettering but my white jelly roll didn't want to work on my disressed surface so it's not as defined as I would have liked. 

Joining the fun at

Thanks for your visit.  Hugs

Sunday 20 April 2014

What? Again!!

Hello.  Welcome.  I rarely make the same design twice.  That said it's not exactly the same design.  But then again, when you find something you like.......


Thinking this works perfectly for the boys with Paper Smooches Cuteasaurus stamps.  I've coloured with promarkers and I don't know where the polka dot paper tape came from but isn't it cool?  Would look good wrapped around an Easter egg. 

Joining the fun at
Paper Smooches Sparks - Anything Goes
Simon Says Stamp Wednesday Challenge - Animal Antics
Emergency Crafters Challenge - Polkadots 
YNS Fun Friday Challenge 11 

Thanks for dropping by.  Hope you had a great and happy Easter.  Hugs

Saturday 19 April 2014

Giving is More Important

Hello. Welcome.  This project started life as an A4 piece of lilac card, because the Cheery Lynn challenge this week is purple, and one of my favourite quotes about change inspired by this fortnights challenge at The Craft Barn.  


My base card is lilac and all the papers are shades of purple.  All my dies are Cheery Lynn, Ship's Compass, Owls With Gears, Pocket Watch, Spring Flower Burst Doily and Angel Wing, Spider Web Mesh Border.  I used motifs that to me symbolise change.  I used a purple Sharpie to write the quote and outlined with a white Sakura Gelly Roll pen.  The brads and the little clock are Storyteller.  I distressed the edges of my card and inked with DI Dusty Concord and VersaMagic Perfect Plumeria.  

I don't know where this quote comes from and have decided it doesn't matter.  I am sure more than one person has said this, I know I have said it many times myself.  It doesn't matter who said it first, just that it was said.  I have decided that since it's my birthday in a few days, and since it is something I should think and act more on, that I am going to keep this for myself.  To remind me. 

Joining the fun at
Cheery Lynn Designs Challenge 128 - Pretty in Purple
The Craft Barn Q&L Challenge - Change/Truth
Joan's Touch Challenge 9 - Dies, no stamps, layers, any colours
Storyteller Norge Utfordring 14 - Charms
Simon Says Stamp Monday Challenge - Winged Things

Thanks for dropping by.  Hope you are having a great Easter weekend.  I'm certainly enjoying the sunshine.  Hugs

Through the Dragon's Eye

Hello.  Welcome.  It's a lovely sunny day.  Hurray.  So why am I sitting in crafting??!!!  Well..... I had a quick peek over at PaperArtsy and JOFY has been playing with the masterboard we made previously.  Mine's here.  Going to have a go at some of the other lovely ideas real soon but just had to, had to! make one of these chalkboard cards. 


A tad frustrated with the photography.  I though natural light would give a better photo  but having trouble with the colour balance.  Third time lucky, although I'm sure my edges are straighter than in this photo!!  I mentioned in my masterboard post that I thought it needed some yellow.  I started filling in the background but it was taking sooooooo long I only did a small area.  Enough to cut this cute little circle.  I've stamped the flower again on white card, cut it out and stuck on top of my masterboard circle.  I've used SIDD5 It's Your Birthday stamps and a galaxy marker for my lines.  The sentiment, bubbles and flower were stamped using Docraft Artiste white pigment ink.  The printed tissue was supplied by my friend Kay, HI KAY, and I used a piece of Forever in Time paper tape.  

Really liked this so decided to try it with a piece of the masterboard without the yellow background.  


Maybe this is better.  The white background more in keeping with the chalkboard colours. 

Joining the fun at

Thanks for your visit.  Off to soak up some sun.  Big hugs


Thursday 17 April 2014

Easter Bunny

Hello.  Welcome.  I don't seem to be able to escape the hot pink today!  Over at The Greeting Farm the Colour challenge is purple, pinks, blues so here's Pretty Hat out and about with her Easter Bunny and Easter Chick.


I started by stamping Pretty Hat onto Stardream card and colouring her with Promarkers.  The stardream has built in bling and I love that this show through the promarker ink.  The bunny is actually Pretty Hat's dog!!   In this rubber stamp set she comes with a dog and also a bunny and cat head and the cute little bird and a load of other small stamps.  I was going to have the dog there and then I thought in the spirit of Easter I would cut off his head!! and tail!!! and give him a rabbit head instead.  Sounds a bit drastic but he makes a very cute rabbit don't you think?  Over at I Love Promarkers the theme is Cats and Dogs.  Do you think this would still count even though he's wearing a bunny head?  ROFL  OK, maybe too many chocolate eggs already!  The bunnydog and chick were stamped onto purple dotty paper.  The doily is Cheery Lynn Spring Flower Burst with matching angel wing.  The inner circle is Making Memories paper and I drew some lines with a Rose Pink Promarker to give Pretty Hat and Bunnydog something to stand on.


The background paper was a happy accident.  I found this lovely paper from Making Memories which has these embossed leaves on it.  I was inking the edge with DI Salty Ocean and liked the effect on the embossed areas so inked it all over.  Then I thought it was too much, spritzed with water and blotted with some paper.  The result looks a bit like leaves against a cloudy sky.  Happy accident.  Isn't Bunnydog cute?


I've used a purple base card and I also added some pink satin ribbon across the card.

Joining the fun at
The Greeting Farm - Colour Challenge
Crafty Ribbons Challenge 85 - Anything Goes with Ribbon
Simon Says Stamp Wednesday Challenge - Animal Antics
Loves Rubber Stamps Challenge 99 - Easter or Spring Theme
Simon Says Stamp- Work it Wednesday March 2014

Thanks for your visit.  In the mojo zone today.  Might try for a hat trick.  Hugs

Hot Pink, Grey Day

Hello.  Welcome.  I reached for the hot pink card again this morning.  A grey, cold, wet day I need a bit of bright.  They have forecast nice weather for the rest of the weekend so here's hoping.  Hero Arts have a Spring Sketch Challenge going on and I have used Sketch #2.


I folded my hot pink base card and then added a layer of the background I made using Hero Arts Asian Element stamp.  For details see this post.  Then I took a tag, stamped the same flower image in black archival and layered it onto a piece of the same flower stamped background.  All edges have been inked with VersaMagic Pink Petunia and Perfect Plumeria chalk inks.  The sentiment is also a Hero Arts stamp on some Do Craft patterned paper from their Born to Shop range.

Joining the fun at

Hero Arts Spring Sketch Challenge - Sketch #2
A Blog Named Hero Challenge 42 - Layer Cake
Bunny Zoe's Crafts March Challenge - Monochrome
StampARTic Challenge - Color Theme

Thanks for dropping by.  Hope you are having a great day.  Have you started your Easter break yet?  Hugs

Wednesday 16 April 2014

Simple CAS

Hello.  Welcome.  Happy mail today containing a couple of new Memory Box dies.  Joan had just posted her challenge over at Joan's Touch and these two happy incidents resulted in an idea for a this little beauty. 

 
I used an A4 piece of cream stardream card.  How cool is that sparkle.  I cut it in half and folded one half for my base card.  I cut a panel the same height as the base card but a little narrower and then I used Memory Box Calm Countryside die to cut the aperture.  I cut the final piece of the card using Memory Box Golf Club Landscape.  Then I mounted all the layers on foam pads.  A bit fiddly behind those little trees and the flag.  The things we do for arts sake.......  

Joining the fun at
Joan's Touch Challenge 9 - Any colour, dies only, 2 or more layers
Crafting Musketeers Challenge 12 - Monochrome
7 Kids Challenge 97 - Anything Goes with a Twist
Bunny Zoe's Crafts March Challenge - Monochrome

Thanks for dropping by.  Still a few hours to sign up for CCC.  Hugs

Sunday 13 April 2014

Moving Load

Hello.  Welcome.  I hope Spring and the sun have found you.  There are signs of Spring here.  A few leaves breaking on the trees.  Colour in the Magnolia buds.  Bird wars in the bushes.  Today it is cold and windy and wet, so despite the signs I'm snuggled up inside with a desk full of partly finished projects.  

Lots of good inspiration over at PaperArtsy again this week and I decided to do a quick make, that of course took longer than expected, inspired by Helen's tag.   The crafting has been a bit stop and start.  Despite the bad weather people have been dropping in all afternoon, although some came with Thai food and cake so no complaints ;-)   Nam Nam.   I have made a pink ATC!  Not my usual colours but I am having urges to use red and pink at the moment.  Maybe it's because these colours are so lacking in the landscape and I am wishing  for warmer times.  


See.  Pink.  I stamped the snail on paper with a pink pattern and paper pieced the arrows on it's shell.  Despite the moustache snails are a bit of both so it's an it, or maybe a hem??  His, hers, hems?  May coin that.  I backed it with book paper, Norwegian text, and some script paper.  Then I layered on torn pink handmade paper and a hot pink ATC.  I stamped with Crafty Individuals splat stamp and DI Walnut Stain here and there and everywhere.  I used fancy scissors to cut the ends, made some holes and filled them with various fibers.  The watch and the sofa are metal charms from Korthobby.  Moving home maybe......


Joining the fun at
PaperArtsy
Korthobby Utfordring April - Alt er Lov 
Simon Says Stamp Monday Challenge - Journey 
Stampotique Designers Challenge 141 - A Bit of Humour 
Bunny Zoe's Crafts March Challenge - Monochrome

Thanks for dropping by.  Hope you are having a great weekend and getting time to be crafty.  Still time to sign up for CCC.  Hugs

Saturday 12 April 2014

Football Crazy

Hello.  Welcome.  This was supposed to be a male themed birthday card but how could I resist this cute image?? 


I've used an image from LOTV Just for Girls art pad.  I diecut Cheery Lynn Emperor Swan and used the frame.  Then I went a little crazy with the flowers.  To make my bouquet I used Cheery Lynn Wheat Heads, BAF #3 Embellishments, BAF #1 and a few flowers cut using Memory Box Norwich Border.  The sentiment is from PaperArtsy SIDD5 stamp set.  I layered on Basic Grey paper and a steel blue card base.  

Joining the fun at
Cheery Lynn Designs Challenge 127 - Anything Goes
Joan's Touch Challenge 8 - Plaid/Check/Stripe paper, frame an image
LOTV Challenge - 10th Birthday Card

Thanks for your visit.  Still time to sign up for CCCHugs

Friday 11 April 2014

CCC March

Hello.  Welcome.  I have been playing along with the Card Chain Challenge and what fun it is.  Make a card and send it to the person above you on the list.  The person below you on the list sends you a card.   Everyone's a winner.......


This is the card I made and sent to Annick in Mauritius.  I used a steel blue card base and layered with MME printed cardstock.  I used some wash tape and cut Memory Box Tree of Wonder from glitter card.  The sentiment is a Hero Arts stamp.  

I'd like to thank Janet for the lovely card she sent me.  If you'd like to see it, and all the lovely cards made by the CCC participants for March, check out the full reveal post.  There's still time to sign up for April.    Join us swapping cards with some friends you haven't met yet. 

Joining the fun at
Die Cut Divas - Lorikeet Colours

Thanks for your visit.  Have a great weekend.  Hugs

Thursday 10 April 2014

Birthday Surprize

Hello. Welcome.   I have made my first hidden tag card. Should have posted this yesterday but the evening kind of slipped away........


I wanted to keep it simple.  The image is from LOTV Just For Girls art pad.  I cut it and the frame using Sizzix Scallop Rectangle dies.  The patterned paper is My Minds Eye Collectables.  It's a bit more chocolatey in real life.   The edges are inked with DI Walnut Stain.  I added a button and a piece of lace to the tag. 


The tag is cut from a piece of Crate Paper patterned cardstock and the sentiment, Norwegian birthday wishes, is computer generated.  Both were cut using the scallop rectangle dies.  This would be a great place for a gift card.  Note to self.. must remember that. 

Joining the fun at
Simon Says Stamp Wednesday Challenge - Happy Birthday  
Joan's Touch Challenge 8 - Plaid/Check/Striped paper, a border round an image
LOTV Challenge - 10th Birthday 
That Craft Place Challenge - Buttons

Thanks for your visit.  Hugs

Wednesday 9 April 2014

We Wantz Your Brainz

Hello.  Welcome.  Excited and honored that I was asked by Jenn over at Wicked Wednesday ATC Challenge to be a guest designer.  This week it's Crazy Craniums.  What fun.  I was given some images from Smeared Ink to play with.  I used a digital stamp called 'Cranium Captain' from the Smeared Ink Costumed Cranium set.   


I used PaperArtsy Fresco Finish Inky Pool as a wash base for my ATC.  Then I stamped with a underwater background stamp in Memento London Fog and Tuxedo Black.  Cranium Captain is coloured with Promarkers and I added glossy accents on the skull and also the bones on his hat.  Maybe he's supposed to be scary but I decided to make this a bit fun with some googly eyes.  He does look a bit worried doesn't he.  The fish were cut from printed velum and I backed them with silver foil.  

Do come and join us this week over at Wicked Wednesday ATC Challenge.   It's fun.  There are prizes.  Off to check out everyone else's Crazy Craniums.

Thanks for your visit and comments.  Hugs

Hoppy in Pink

Hello.  Welcome.  Spring is in the air.  Hoping for baby bunnies soon.  Here's one to keep us company while we wait....


I started by making a background using DI inks.  I put ink from the pads onto a craft sheet, spritzed with water then used this to stamp using a stamp from Hero Arts Asian Elements set.  Wasn't sure at first but pleased with the finished look. 


I cut an ATC from pink card using Sizzix ATC and corners die then added a layer of the flower background.  The foliage was cut using Memory Box Serafina Heart die.  The grass was fussy cut from kraft and tinted with DI.   I coloured some card with alcohol inks and then cut the bunny using Sizzix Stuffed Bunny die and added some detail with black and white ink. 

Joining the fun at
Wicked Wednesday ATC Challenge 130 - Bunnies 
A Blog Named Hero Challenge 41 - Build a Background 
Stamping Sensations April Challenge - Dies/Punches 
Kort o Mania Utfordring 105 - Paske 

Thanks for dropping by.  Hugs